Monday, July 9, 2012

Instagram

Not many pictures this week...


Friday, July 6, 2012

Crochet California Roll Sushi Tutorial

My husband has been on a Sushi kick lately, were new to it but enjoy it. Last week I had a late night, not for any particular reason other than that I was feeling crafty. I thought it would be funny to make hubby some sushi!! I figured since traditional sushi is rolled that croched sushi should be too. Here is how you can make some of your own!

Materials:
 Scrap Green, White, and Orange yarn.
 size H Crochet needle
 Yarn needle
 Scrap black fabric
Stitches used: Chain, Single Crochet.
Step 1.
With Orange yarn chain 6.
Row 1. SC in 3rd chain from hook and in remaining 3. (4 sc) ch 2 and turn.
Row 2. ( ch 2 counts and first sc) Sc across (4sc) tie off
Row 3. With green SC across 4 ch 2 turn.
Row 4. ( ch 2 counts and first sc) Sc across (4sc) tie off
Row 5. With white SC across 4 ch 2 turn.
Row 6- 18 .  ( ch 2 counts and first sc) Sc across in remaining 3 (4 sc) ch 2 turn.
At the end tie off and weave in ends.

 Step 2. Cut a small strip of black fabric that is about 4in long and the same width as the strip of crochet.
 Step 3. wrap the black fabric in with the crochet strip to make it look like seaweed inside the roll.
 Step 4. Seam up the end of the wrap so it is flat. tie off and weave in ends.
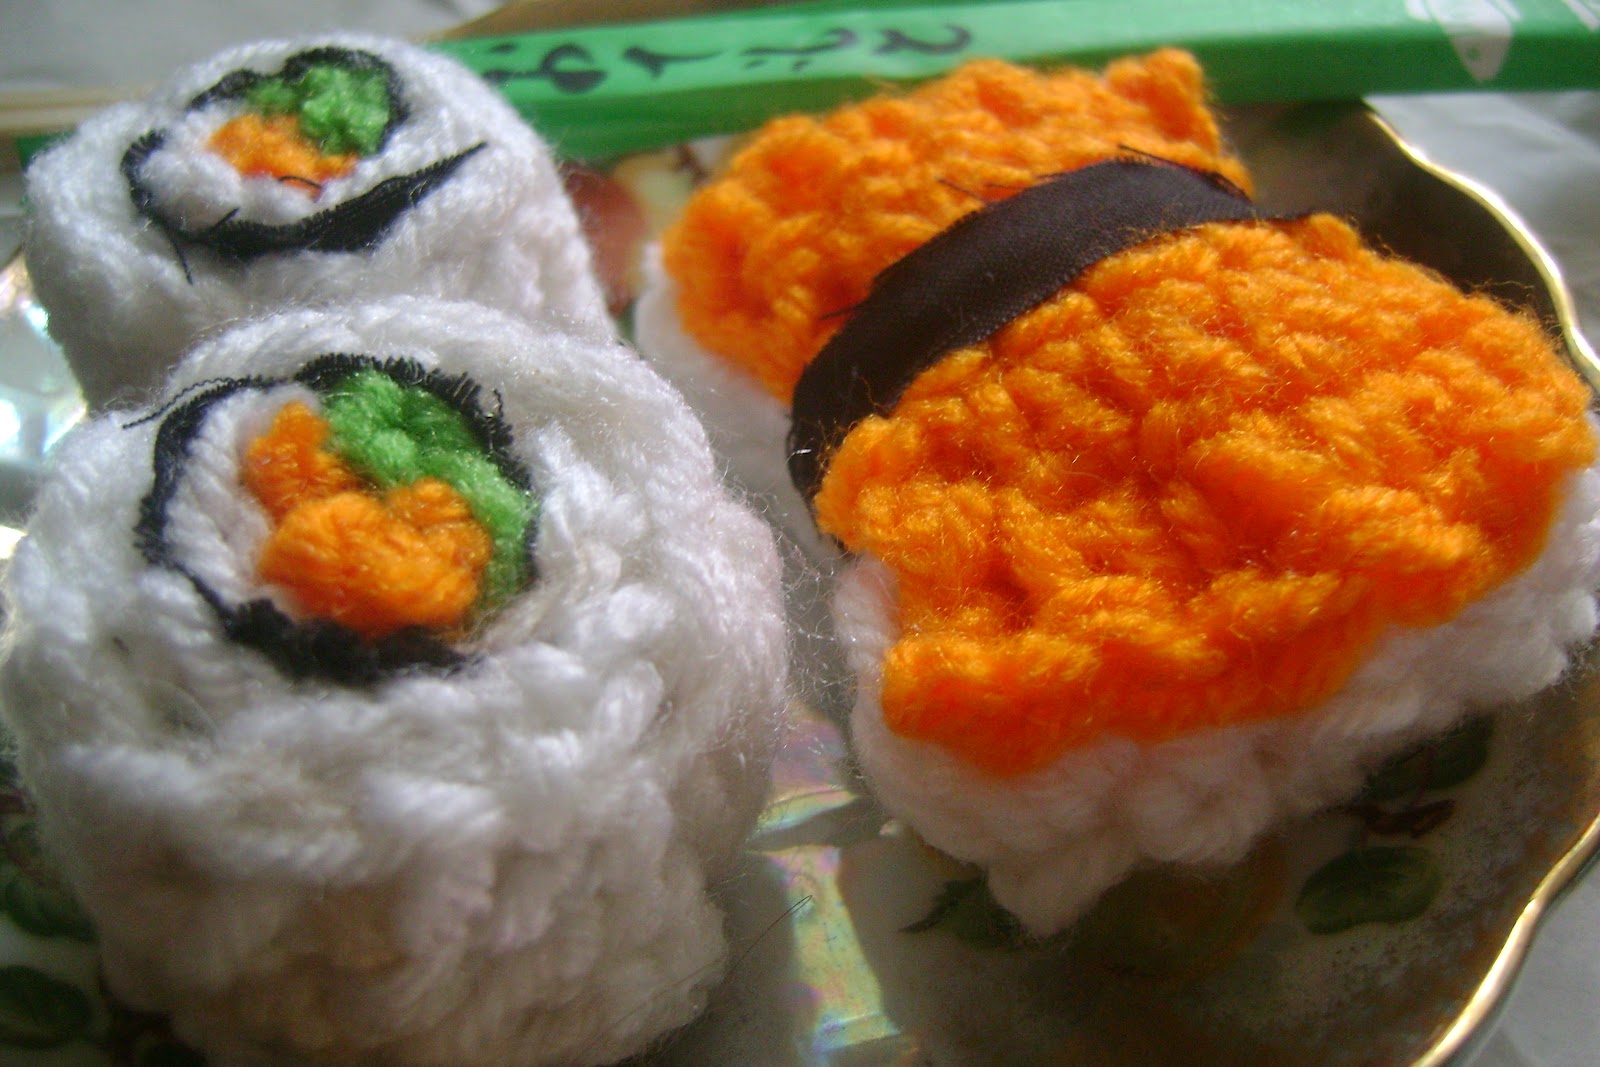
 Ta da!! Sushi (Not edible) Looks good enough to eat tho!!
 Close up and an Salmon sushi too.
 Yummy!! They also make great gifts for kids !!
Not exactly Romantic, but fun!!

Thursday, July 5, 2012

Romantic Item Of The Week!!

Due to the holiday yesterday I was not able to sit down long enough to post. Happy Independence day America!! This week I'm showing a new addition to my collection. It was given to me by a good friend that didn't have room for it any more. In the winter I drink more tea, and usually make it in the cup. I have a tiny teapot that is more for decoration than making tea, this teapot could be used to entertain friends. I have not done any research on it yet nor have I decided where to put it but I think it is adorable!
 Close up front
 Printed label on the bottom.


 Little flower on the back.
Hope you have a romantic day !

Wednesday, June 27, 2012

Romantic item of the week!!

I was thinking a good way for me to decorate my home more romantically would be to show what I have and build on to it.
Todays feature is a hand made porcelin doll. My grandmother made her, and I was lucky enough to bring her home with me when my grandma passed away. I have given her the name Elanor. She now sits in my china cabinet, watching us as we eat dinner. I Simply adore her.
Her dress is entirely hand draped, and tiny little roses are placed on her perfectly. Her sweet face was hand panted , you can tell my grandmother loved making dolls.


Tuesday, June 26, 2012

House wife hair !!

Want to look stylish while cleaning, cooking, and picking up kids ? Well this tutorial is for you!!


Step 1. Brush all hair to top of head. Lightly spray the back with hairspray.
Step 2. Bring all hair to a point and roll down towards forehead.

Step 3. Pin roll on either side and lightly spray to keepin place.
 Step 4. Fold a square scarf in to a triangleand place folded end on the lower part of your hairline in the back. Hold 2 ends together at front of head.

Step 5. Tie ends in front just below the roll.
Step 6. Pull top of triangle towards forehead and tie in to the front ends. Tuck under knot. Tuck remaning ends in aroud the face pin if needed.
Tada!! Let me know how it works for you!!