Showing posts with label Tutorial. Show all posts

Wednesday, February 27, 2013

Tutorial: Magnetic Clothespins

I have a bunch of pictures that are just stuck under magnets and papers on the frige. I wanted to see them so I decided it was time do do something about my messy frige. In about 20 mins I made adorable magnetic clothespins.
 Problem solved!
I have always been a fan of clothespins. I use them for everything and always have some on hand.
 
 
Supplies: Clothespins, buttons, magnets, glue gun and sticks, scissors and of course the pictures.
 First I glued the buttons on in like colors or shapes. Layed flat to dry
 Second I glued the strips of magnets to the back and layed flat to dry.
 Much better looking pictures!! (sorry about the lighting) I am very happy now.
 
-Mj

Wednesday, July 18, 2012

Chocolate Mold Mustache Tutorial

Have you ever thought to yourself, I would love a chocolate mustache? well now you can have one!!


Things you will need:
Mustache mold ( I found this one at Michaels)
Chocolate candy melts
Candy sticks
Measuring cup
Butter knife (not pictured here)


Step 1. Pour candy melts in to measuring cup and microwave according to directions. (I warm in 20 sec intervals 30 always burns for me) stir in between microwaving.
Step 2. After melted use butter knife to help pour melted chocolate in to molds with stick in place. I then take the knife and smooth down the chocolate so it is even through out.


Step 3. Place on a flat surface in freezer or frige for 10-15 mins. Or until solid.


Step 4. Flip mold over and twist mold until mustaches fall out.

Then Ta-Da !!! Mustache on a stick mad of chocolate!

Hope you liked them!!

Saturday, July 14, 2012

Seed packet zipper pouch.

I bought this fabric in a thrift shop in pasadena, california. I just adore it. I made a shopping bag out of it, and it is for sale on my etsy store. (Their is a link in the side bar) I had some left and thought a make-up zipper pouch would be super cute with the pattern.
This was supposed to be a tutorial but, due to internet and camera issues it did not happen. I think I may still put up a tutorial but for now this is the finished product.


Friday, July 6, 2012

Crochet California Roll Sushi Tutorial

My husband has been on a Sushi kick lately, were new to it but enjoy it. Last week I had a late night, not for any particular reason other than that I was feeling crafty. I thought it would be funny to make hubby some sushi!! I figured since traditional sushi is rolled that croched sushi should be too. Here is how you can make some of your own!

Materials:
 Scrap Green, White, and Orange yarn.
 size H Crochet needle
 Yarn needle
 Scrap black fabric
Stitches used: Chain, Single Crochet.
Step 1.
With Orange yarn chain 6.
Row 1. SC in 3rd chain from hook and in remaining 3. (4 sc) ch 2 and turn.
Row 2. ( ch 2 counts and first sc) Sc across (4sc) tie off
Row 3. With green SC across 4 ch 2 turn.
Row 4. ( ch 2 counts and first sc) Sc across (4sc) tie off
Row 5. With white SC across 4 ch 2 turn.
Row 6- 18 .  ( ch 2 counts and first sc) Sc across in remaining 3 (4 sc) ch 2 turn.
At the end tie off and weave in ends.

 Step 2. Cut a small strip of black fabric that is about 4in long and the same width as the strip of crochet.
 Step 3. wrap the black fabric in with the crochet strip to make it look like seaweed inside the roll.
 Step 4. Seam up the end of the wrap so it is flat. tie off and weave in ends.
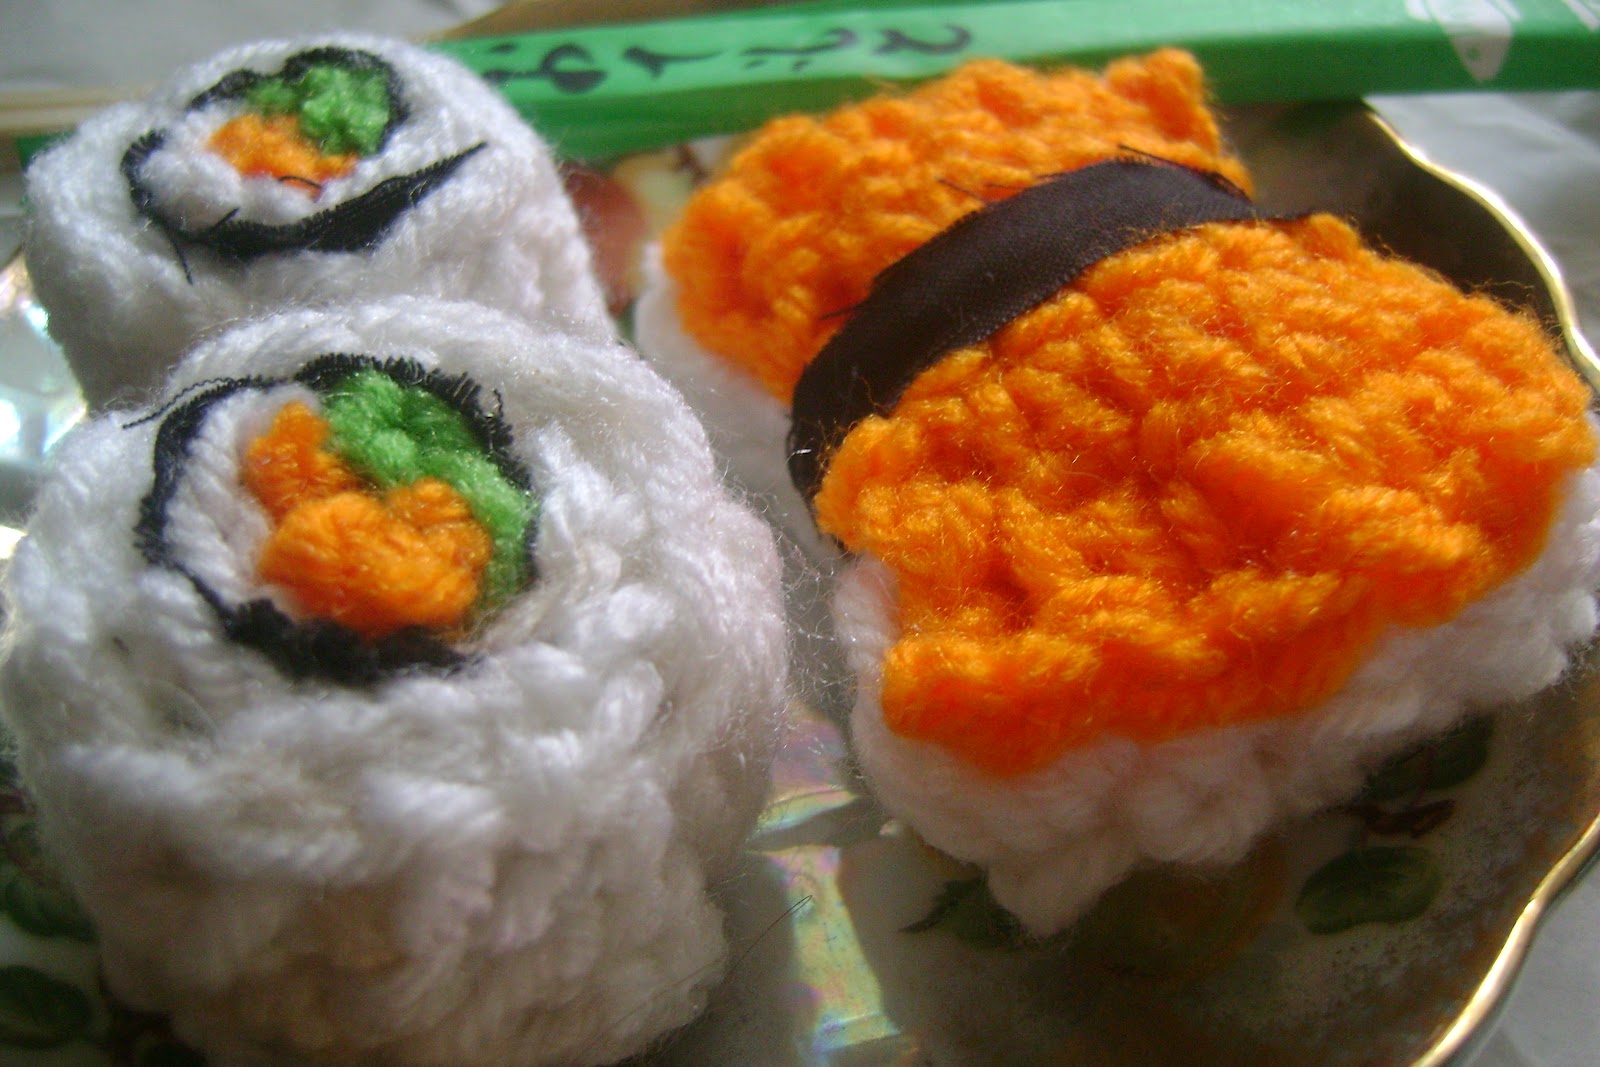
 Ta da!! Sushi (Not edible) Looks good enough to eat tho!!
 Close up and an Salmon sushi too.
 Yummy!! They also make great gifts for kids !!
Not exactly Romantic, but fun!!

Tuesday, June 26, 2012

House wife hair !!

Want to look stylish while cleaning, cooking, and picking up kids ? Well this tutorial is for you!!


Step 1. Brush all hair to top of head. Lightly spray the back with hairspray.
Step 2. Bring all hair to a point and roll down towards forehead.

Step 3. Pin roll on either side and lightly spray to keepin place.
 Step 4. Fold a square scarf in to a triangleand place folded end on the lower part of your hairline in the back. Hold 2 ends together at front of head.

Step 5. Tie ends in front just below the roll.
Step 6. Pull top of triangle towards forehead and tie in to the front ends. Tuck under knot. Tuck remaning ends in aroud the face pin if needed.
Tada!! Let me know how it works for you!!

Thursday, April 19, 2012

Emees Easter Hat.


We decided it would be fun to wear big fancy hats on Easter. My little girl has tons of hats but nothing fancy, we then decided to make her one.  We started with a plain hat from the 99 cent store, feathers , flowers, gems, a hot glue gun, and a little creativity.
 First I took off the flower that was already there and added 4-5 fluffy white feathers. I pointed them in all directions and they sat higher then the top of the hat.
 Next I added some red feathers, and the first flower toward the front. I also glued a large gem in the center of the flower.
 I had a few more red ones so i added where the would fit. Next came the smaller white flower that also had a gem in the middle. That finished it off. It only took maybe 20 mins and turned out great.
 Elegant, romantic, sweet, and festive. Emee girl Loved it too.
 She was so Happy to have a special hat of her own.

Saturday, April 7, 2012

4 Ideas for things to do with scraps: Felt

Felt: This is the last post in the 4 things to do with scraps series. This idea is one I have been thinking about for a long time I love mustaches!!! I have been thinking about having a Mustache bash and this is a party favor I can give out!

Supplies: Felt , kebab stick or dowel, glue gun, glue, paper, pen.


Step 1: Make a template for you stache. It only needs to be half, that way it will be even on both sides.

 Step 2: Fold your felt in half and cut around template. You will need 2 so make sure you have enough scraps to do so.
 2 Mustaches
 Step 3: Put a little glue where you kebab stick will go and place stick in.
 Step 4: You have to work kind of fast here so the glue does not dry but fill the one side with glue all the way to the tips.
 Step 5: Place other half on top and press together , please be careful the glue is really hot!!
 You have done it! Now you will always have a Mustache!
 Had to try it on the family


Hope you liked the series! The next one I'm thinking 4 things to do with a Trader Joe's bag! In my opinion Mustaches are very Romantic!!